Microsoft Word allows us to create labels for a variety of purposes: address labels, labels for file folders or boxes, labels to identify your property, and so on. Label sheets which fit your inkjet printer can be bought in various sizes and styles. Today, we highlight 9 steps on how to print sticker labels in Microsoft Word 2010, and let’s take address labels as an example.
Step 1
Start by inserting the label sheet into your printer, and be sure to insert it with the proper orientation so that your information will be printed on the side of the sheet that contains the labels.
Step 2
Launch Microsoft 2010.
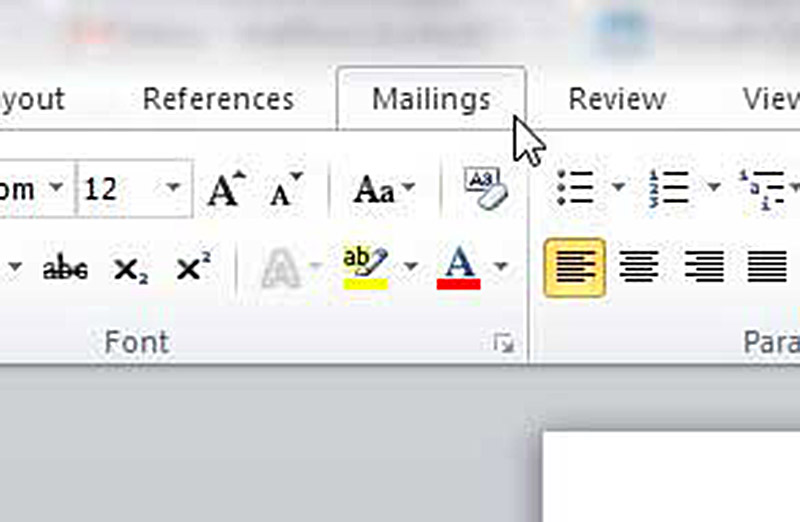
Step 3
Click on the Mailings tab at the top of the window.
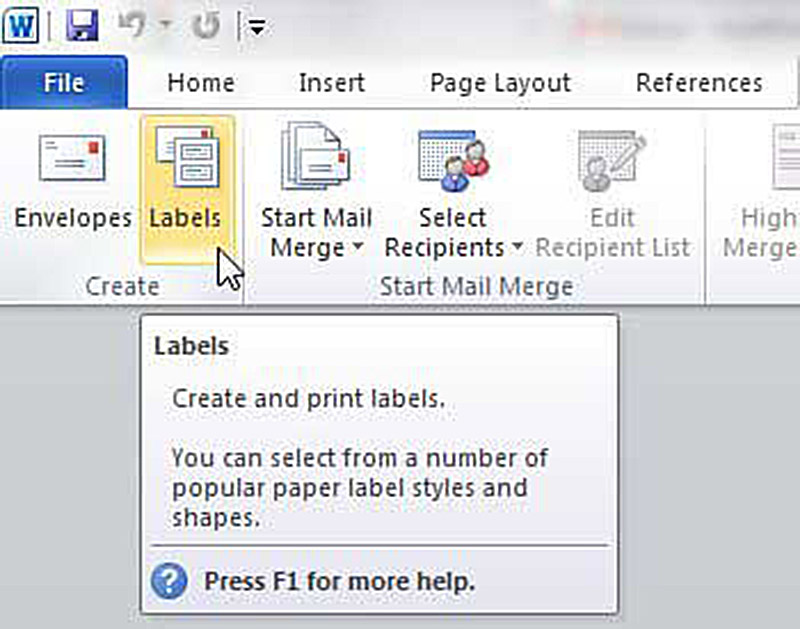
Step 4
Click on the Labels button at the top of the window.
Step 5
Enter your address into the Address section at the centre of the window.
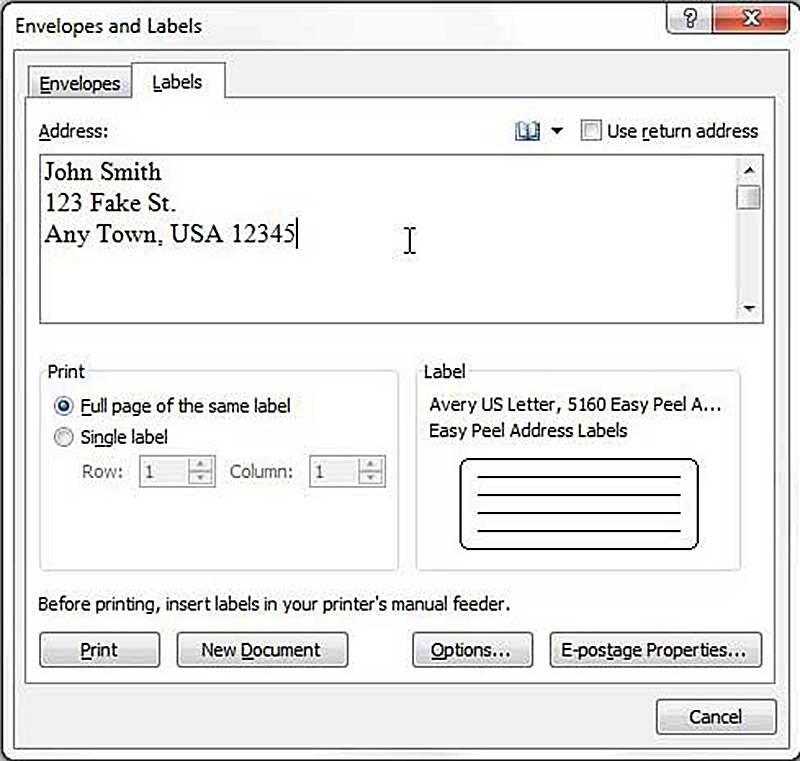
Step 6
If you want to fill the whole sheet with the same address, check the option to the left of “Full page of the same label” in the Print section of the window; if you just want to print one label, check the “Single label” option and select which label to print it on.
Step 7
Click on the Options button at the bottom of the window and choose your label from the lists on the menu.
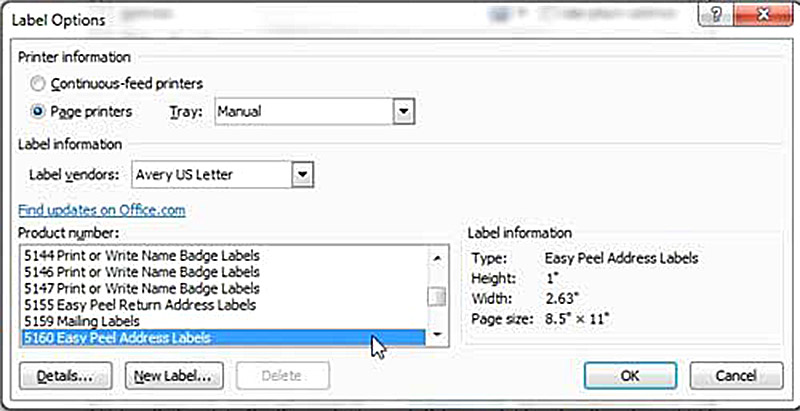
Step 8
Click on OK button to close the “Label Options” window.
Step 9
If you want to view the sheet prior to your printing of the labels, click on the New Document button at the bottom of the window; if you just want to start printing, directly click on the Print button.
These are the 9 simple steps on how to print sticker labels in Microsoft Word 2010 with address labels cited as an example. You can just feel free and be bold enough to try other kinds of labels according to your specific needs.
Note: These are the steps to print a whole sheet of the same label. If you want to print different labels on the sheet, either populated from an Excel spreadsheet or from an Outlook address book, you’ll need to do something called Mail Merge, which is a bit more complicated. For more information about Mail Merge, you can go to Microsoft’s website to have a look.
Post time: Nov-21-2018