The extrusion problem of 3D printing has plagued many 3D printing enthusiasts. The extrusion problem greatly affects the printing effect. In daily printing, it is easy to experience insufficient or excessive extrusion, causing many problems in the printed works. Most of these problems are related to the setting of the 3D printer, and also to the inappropriate temperature of the product used, the non-market standard 1.75 mm Filament diameter/2.85mm diameter, and other problems. The squeeze problem during printing is a blow to the enthusiasm of printing. In order to avoid this problem, we have proposed the following solutions based on experience.
Under-Extrusion
What is Under-Extrusion?
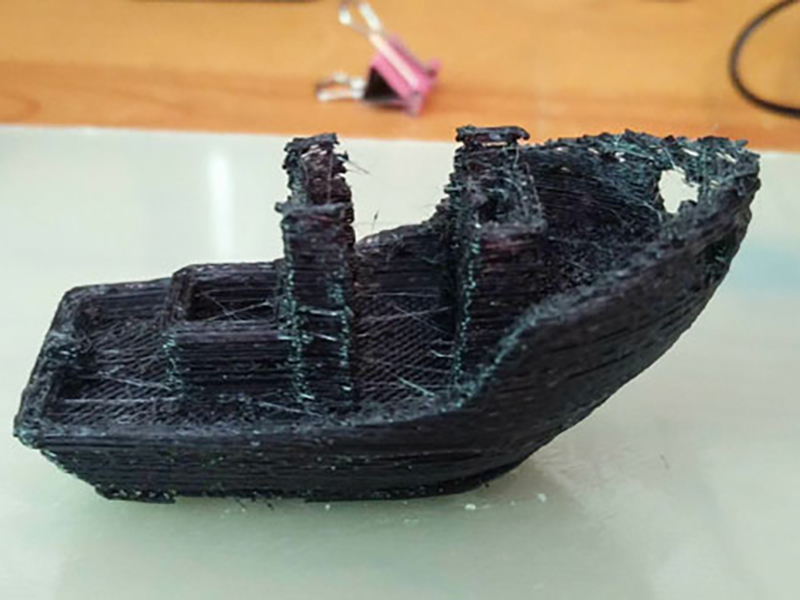
During the printing process, when the extruded filaments are not enough to support the printed content, problems such as gaps, missing layers, thin printing, too many small holes, and insufficient extrusion will occur. If you encounter these problems in printing, you should pay attention to them. This is probably the problem of an insufficient squeeze.
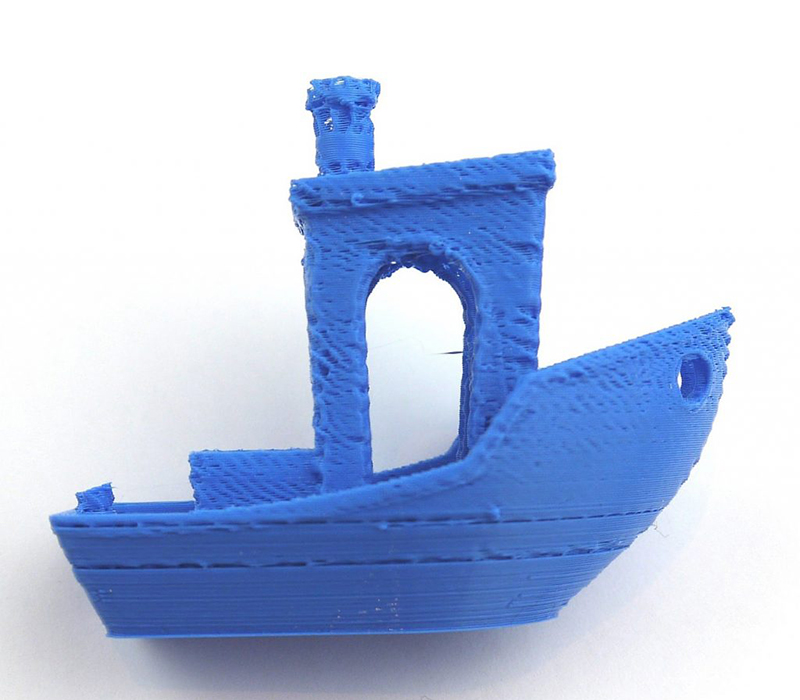
(Under-Extrusion Benchy/Source: 3DBenchy )
How to solve Under-Extrusion?
1. Increase Extrusion Multiplier
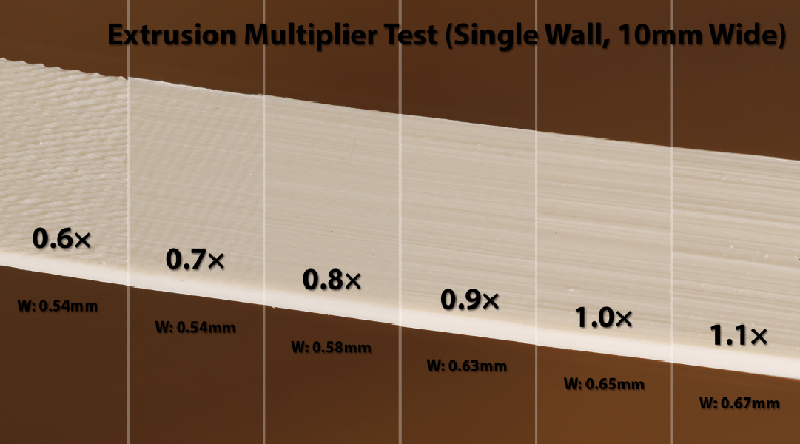
(Extrusion Multiplier Test/Source: 0x7d.com)
When there is insufficient extrusion, we will first adjust the extrusion rate of the machine, because this is directly related to the insufficient flow. We can try to increase the extrusion rate by 5% successively and test until there is an improvement. But please note that increasing this setting too much will also affect the 3D printing effect. Do not increase this setting to more than 115% during the test. Otherwise, problems such as excessive extrusion and excessive material accumulation in the nozzle will occur. If you cannot solve the problem by increasing the rate to more than 115%, then you need to find other methods.
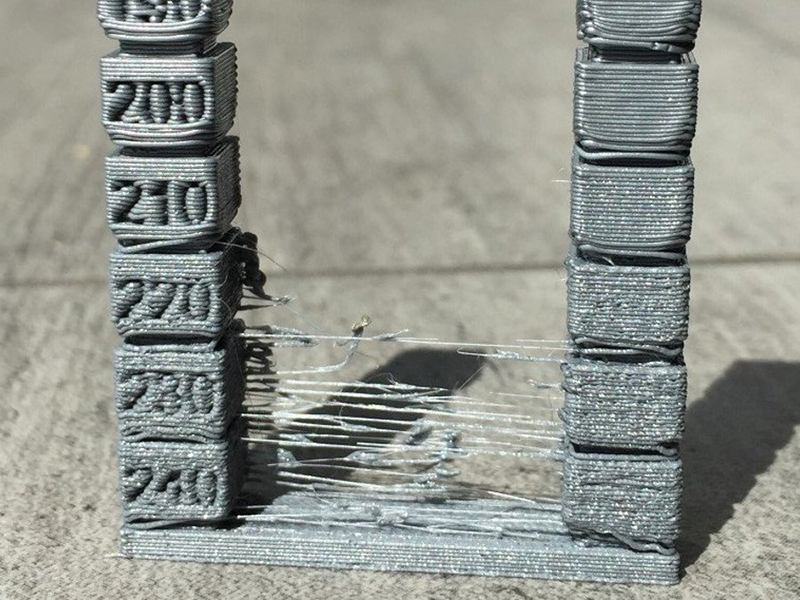
2. Increase Printing Temperature
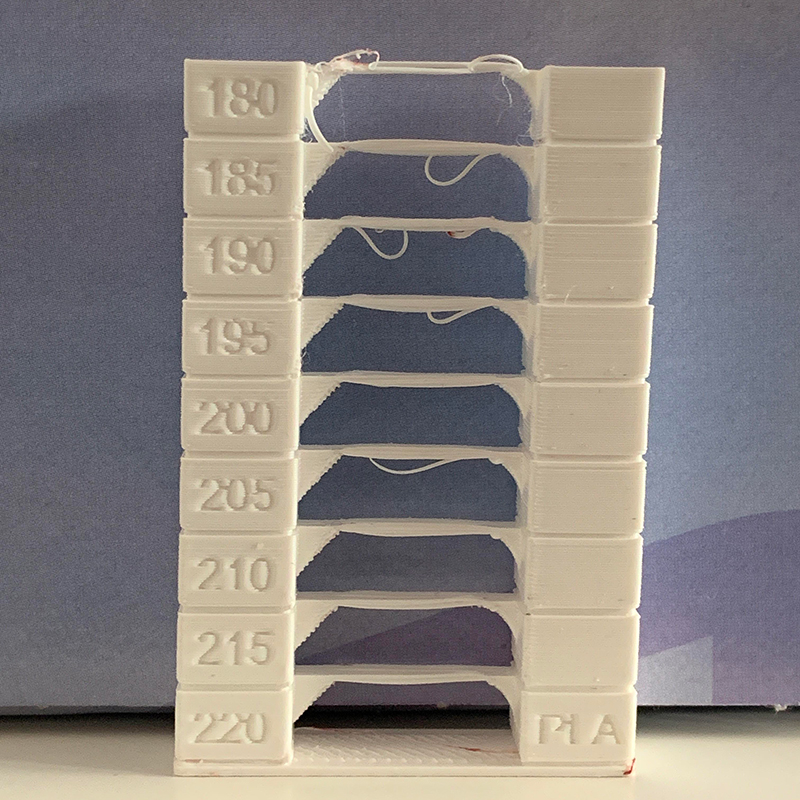
(The temperature tower/Source: Reddit ender 3)
The temperature will positively affect the flow of filaments, the higher the temperature, the easier it will flow. Since the materials of each manufacturer have some differences in temperature requirements, sometimes the temperature is too low and it is easy to cause insufficient extrusion.
When adjusting the temperature, you can try to increase the printing temperature by 5° to test until it suits your machine and material. The temperature tower is a classic model suitable for this test, and you can view the printed effect at each temperature.
3. Clean up the parts of the printer
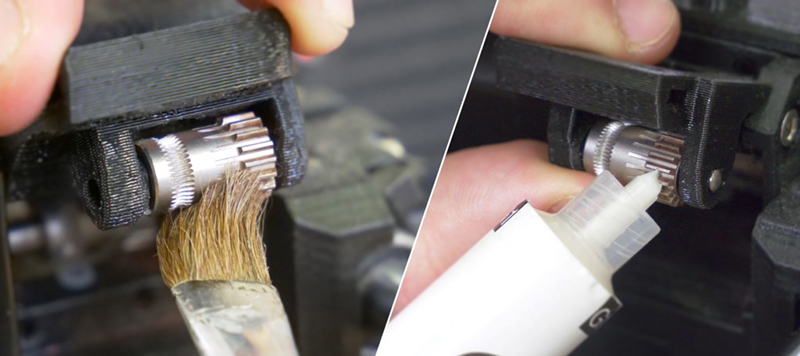
(Steps to Clean Gears/Source: prusa3d)
A common thing is that the teeth of the gears in the extruder are filled with filament material, causing the extruder to fail to push the filament correctly. At this time, you can use metal bristles to clean the attached materials. Of course, we must also check the nozzles, replace and clean the printing nozzles in time.
4. Set the correct filament diameter
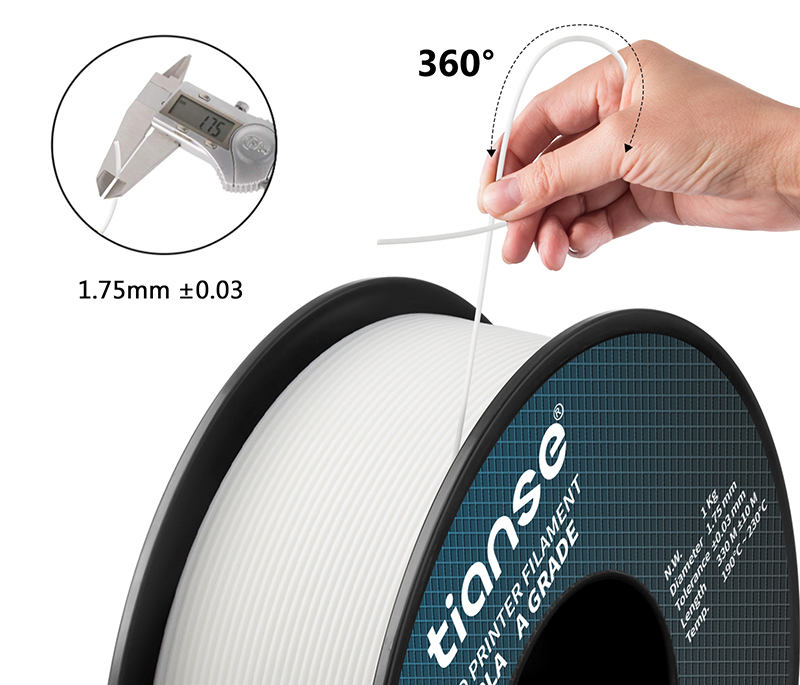
(Tianse 1.75mm Filament/Source: Tianseoffice)
We often ignore this problem. The standard used in the market is 1.75mm filaments, and there are also 2.85mm filaments. However, some brands of filaments may have inaccurate diameters. After setting the standard filament diameter of 1.75mm in the slicer, if the actual filament is not 1.75mm, the extruder will not push the filament at a satisfactory speed. Therefore, when choosing filaments, you should choose a guaranteed seller. Here we recommend Tianse brand filaments. The quality of the filaments is guaranteed and the diameter is accurate. You can try it. When you receive the filament, you can use a measuring ruler to measure and then print. Sometimes, even an error of 0.1 mm can cause printing problems.
Hope that one or all of these methods can help you solve the problem of insufficient squeeze in printing. Make printing smoother.
Over-Extrusion
What is Over-Extrusion?
(3d Printrt Over-Extrusion/Source: 3dprintergeeks)
Contrary to insufficient squeeze, over squeezing is a problem caused by 3D printers extruding too much material. This kind of problem can easily lead to inaccurate model size, layer sagging, wire drawing, exudation, spots, and even paper jams. If you see these symptoms in print, you may be experiencing over-squeezing. This greatly affects the print quality. Cause a waste of materials.
How to solve Under-Extrusion?
1. Reduce Extrusion Multiplier
When we set the 3D slicer, we usually set the rate of extruding plastic to 1 (some slicers are 100%). When there is an over-squeeze problem, consider turning off the multiplier. Try to reduce the extrusion rate in increments of 2.5%-5%. If you can’t solve the problem after reducing the rate to a certain level, then you need to find other methods.
2. Reduce Printing Temperature
(Test Temperature Tower/Source: 17qq.com)
If reducing the squeeze multiple is not effective, then you can consider lowering the printing temperature. If the temperature is too high, the filament will melt excessively and gush out of the nozzle uncontrollably. In the print settings, try to lower the printing temperature of the printer to increments of 5 degrees until you find the temperature that suits your printer and materials. Of course, the temperature tower can also be used here to test the hierarchical effect of the printing temperature.
3. Set the correct filament diameter
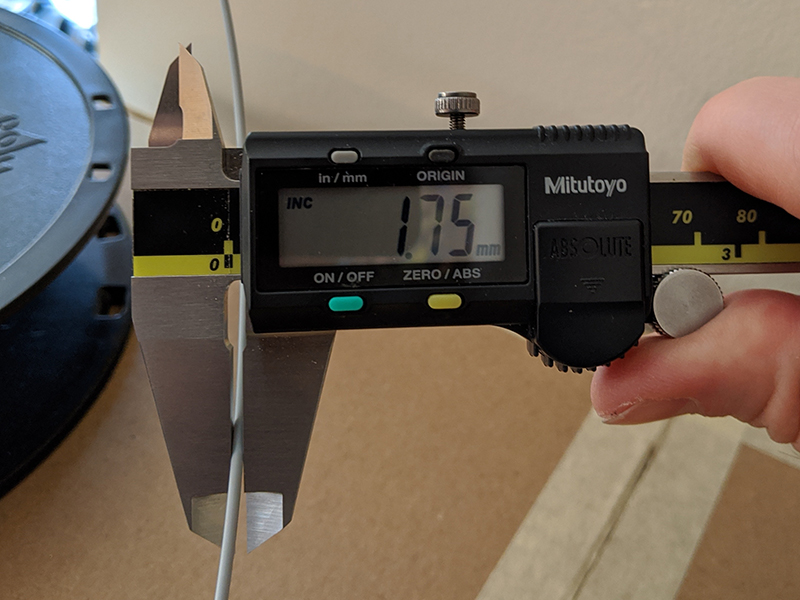
(Filament Diameter/Source: All3DP)
We have discussed the diameter of filaments on the market. If the diameter is too large or too small, it will affect the quality of printing. If your slicer is thinner than the filament diameter you actually use, the extruder will extrude your filament at a higher speed. This leads to over-squeezing.
Like under-extrusion, flow regulation is not the only solution to over-extrusion. If you find that the flow rate and temperature of the printer are continuously reduced without improving the printing effect, you can measure the diameter of your filament and re-enter the actual diameter in Cura according to the diameter.
Post time: Aug-10-2021