Ever need to change your ink cartridges? Although each inkjet printer is a little bit different, they actually follow some basic steps. Today, we’ll discuss how to change ink cartridge for HP Deskjet D4360, D4363, and D4368 printers.
When the ink cartridges are low or out of ink, you need to change the ink cartridges to prevent print quality issues. You can follow the steps below on how to change an ink cartridge.
Step 1: Replace The Old Ink Cartridge
Remove the old ink cartridge and install the new one.
1.1 Make sure that the printer is turned on. Press the Power button to turn on the printer as necessary.
1.2 Open the printer’s top cover.

Pic 1: Open the printer’s top cover
1.3 Wait until the cartridge moves to the printer’s right side and is idle and quiet.
1.4 Press down on the old ink cartridge, then slide it out of the cartridge.

Pic 2: Remove the ink cartridge
- For replacement of the tri-color ink cartridge, remove the ink cartridge from the left slot.
- For replacement of the black ink cartridge, remove the ink cartridge from the right slot.
1.5 Remove the new ink cartridge from its package and remove the protective tape from the ink cartridge by pulling the pink tab.

Pic 3: Remove the protective tape
CAUTION: Do not touch the ink nozzles or copper contacts on the ink cartridge. Touching these components will lead to clogs, ink failure, and poor electrical connections.

1.6 Hold the ink cartridge to ensure that the copper strips are on the bottom and face toward the printer.
1.7 Slide the ink cartridge into the cartridge at a slight upward angle until the ink cartridge snaps into place.
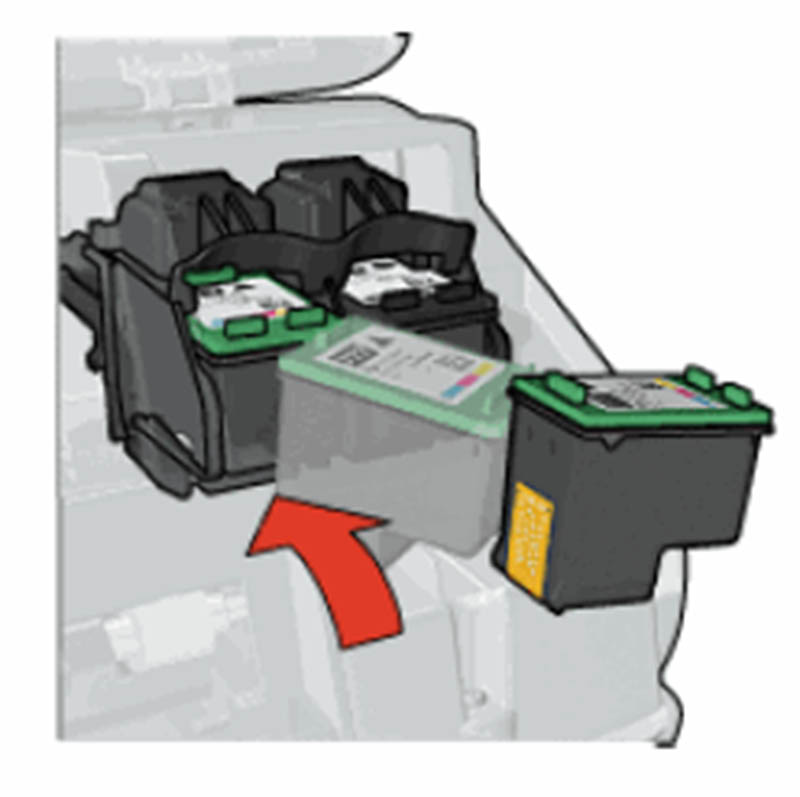
Pic 4: Insert the ink cartridge
- The tri-color ink cartridge is installed on the left side of the cartridge.
- The black ink cartridge is installed on the right side of the cartridge.
1.8 Close the printer’s top cover.
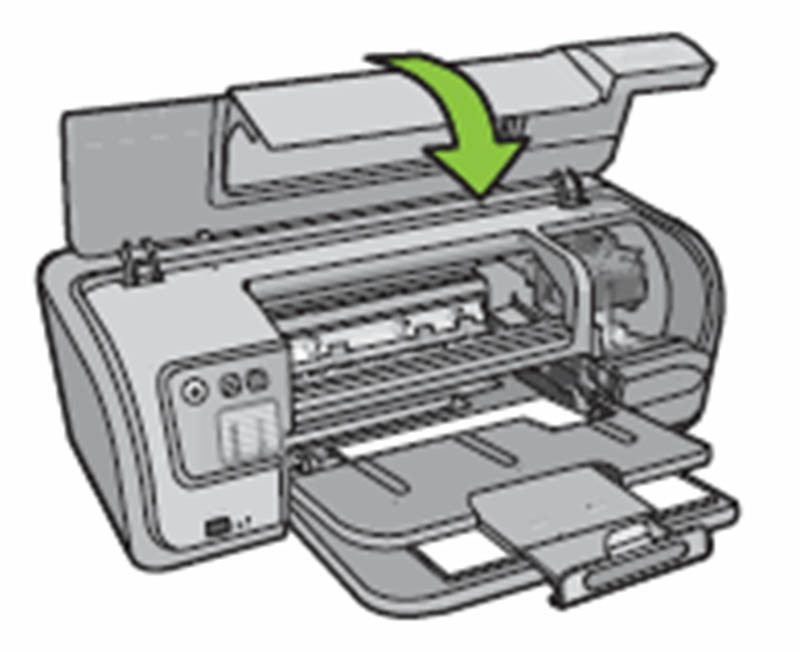
Pic 5: Close the printer’s top cover
Step 2: Align the new ink cartridge
To ensure the best print quality, the ink cartridges need to be aligned. Make sure that A4 or Letter, plain white paper, is loaded in the input tray.
2.1 Use one of the methods below to open HP Solution Center.
- Windows XP: On the Windows taskbar, click Start, click All Programs, point to HP, then click HP Solution Center.
- Windows Vista: On the Windows taskbar, click the Windows icon, click All Programs, point to HP, then click HP solution Center.
2.2 Click Settings, and then click Printer Toolbox. The Printer Toolbox dialog box opens.
2.3 Click Align the Print Cartridges.
2.4 Click Align, and then follow the instructions on the screen.
These are some steps of instruction together with some matters of attention on how to change ink cartridge for HP Deskjet D4360, D4363, and D4368 printers. If you still want to know or get more information, please visit support.hp.com.
Post time: Nov-28-2018