When you’re removing filament, have you ever experienced one of the following issues: a) Filament gets stuck in the hotend; b) Need to use excessive force to pull the filament out; c) Had a hard time feeding the filament back into the proper place; d) Had poor print results after filament removal and replacement. Today, we’ll introduce you 9 steps on how to remove filament from 3D printer properly.
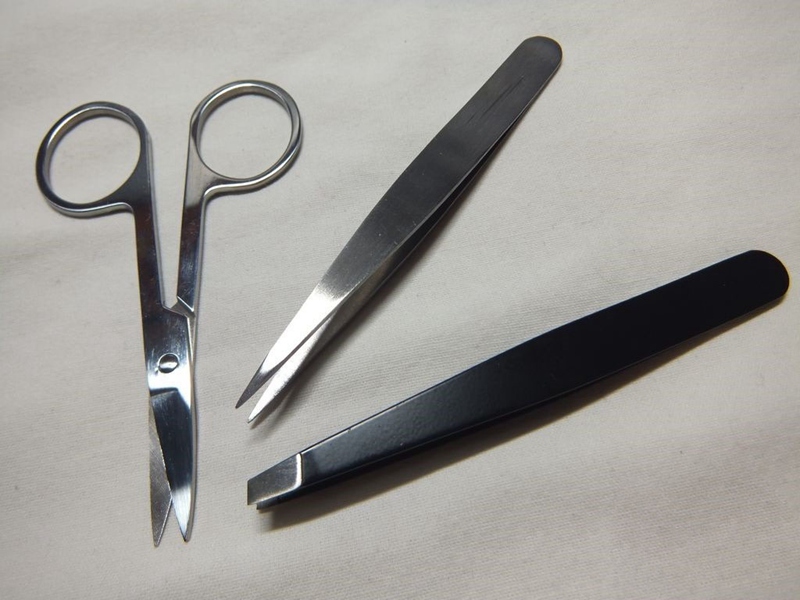
Before you start, have the following tools ready.
- A pair of scissors
- A pair of tweezers
Steps on Filament Removal
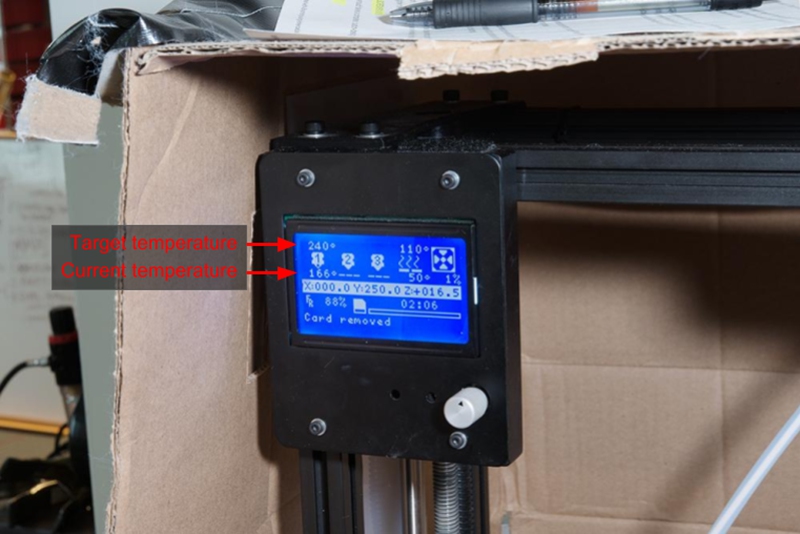
Step 1: Preheat your hotend according to the temperature guidelines for the filament being used.

Note: Never remove the filament from the extruder if the extruder is cold! Always preheat the extruder before removing or changing filaments. Removing your filament from a cold extruder might cause damage!
Step 2: Wait until the hotend heats up to the suggested target temperature (keeping in mind that different materials such as ABS, PLA, and PETG have different temperature characteristics).
Step 3: Manually extrude a small portion of the filament.
- Unclamp the filament.
- Push the filament through the hotend until the melted filament squeezes out from the nozzle. This process ensures that the filament can be extracted easily.
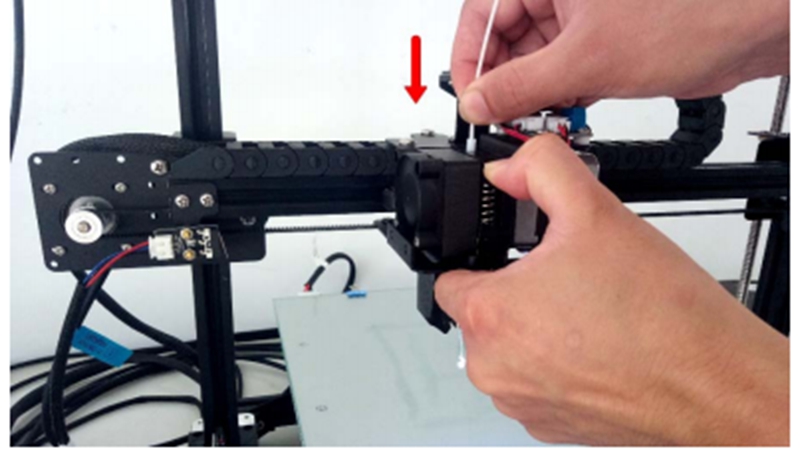
Step 4: Push down the coupling to release the filament from the hotend.
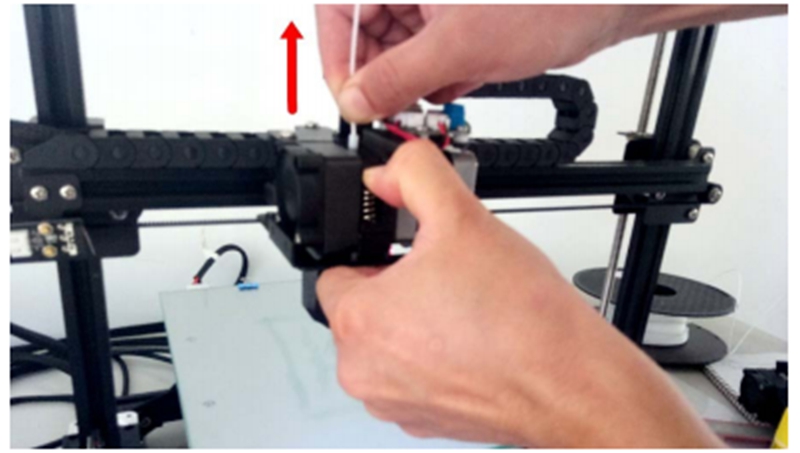
Step 5: Gently unplug the filament from the hotend.
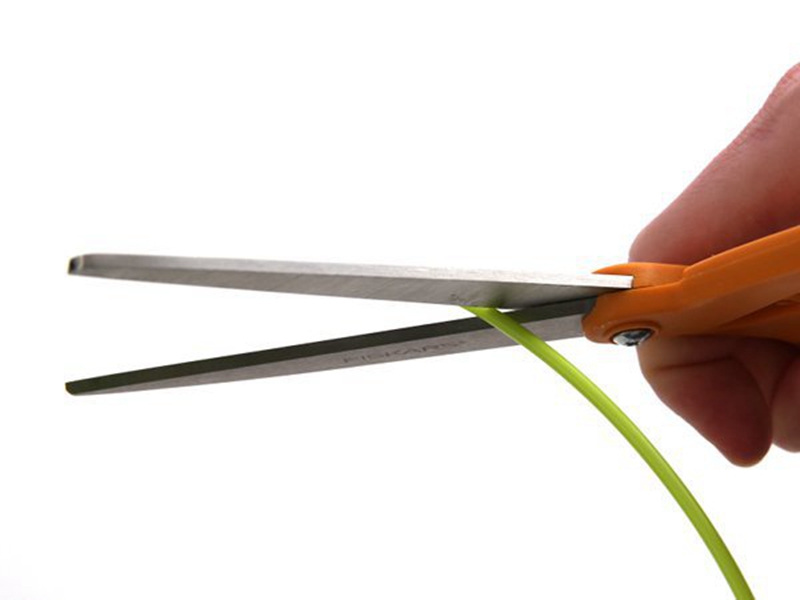
Step 6: Clip off the blob-like end of the filament.
Step 7: Unwind the filament back to the spool holder.
Step 8: Secure the loose end through the hole of the spool holder or use filament clip or tape to bind it properly.
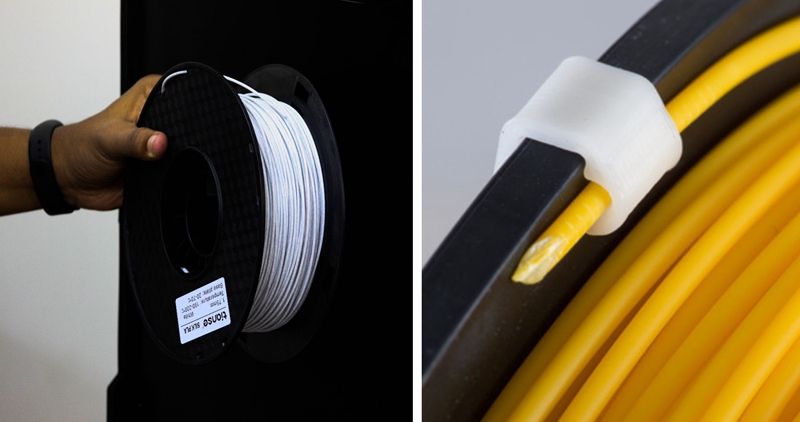
Step 9: Remove the current spool of filament and keep it properly.
The above-mentioned steps only serve as generalized guidelines for your information, and specific steps may vary from printer to printer (check your printer documentation for specific guidelines). We hope you can find something useful from this article on how to remove filament from 3D printer properly. Happy 3D printing!
Post time: Apr-10-2019