When it comes to changing 3D printer filament, most FDM/FFF based 3D printers are similar in principle. A number of newly released 3D printers on the marketplace now even have automatic filament detection and loading feature, which simplifies the entire process. Today we’ll introduce you 4 easy steps on how to change 3D printer filament.
Step 1: Heat Up the Extruder
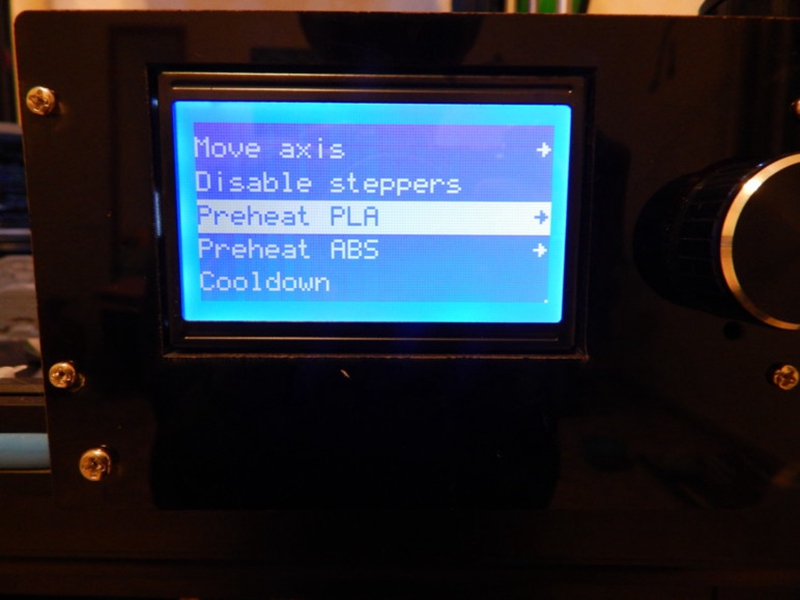
The first step is to heat up the extruder according to temperature guidelines of your replacement filament. Keep in mind that different materials such as PLA, ABS, TPU and PETG have different temperature characteristics. For example, the recommended extrusion temperature for PLA is around 190 – 210℃, while that of PETG is around 220 – 245℃.
Step 2: Retract Old Filament
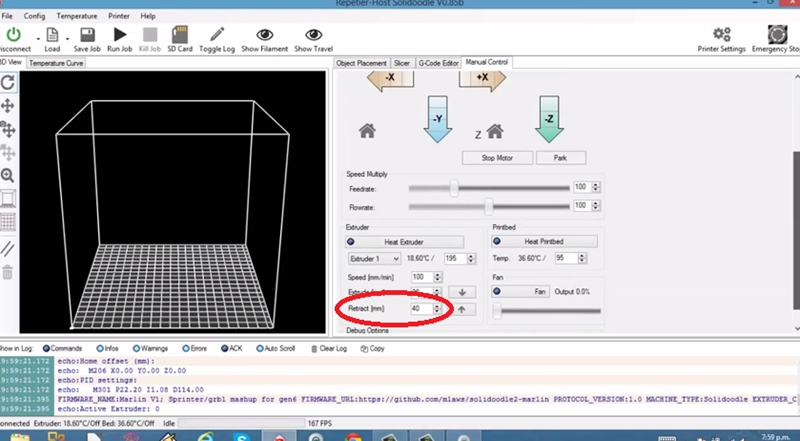
After the extruder has reached the recommended target temperature, you can then remove the filament from the nozzle and extruder. You’ll find a retract setting in the “Manual Control” tab. Repetier Host is set to mm, so we can see in the above picture that 40mm of filament is going to be retracted if we click on the up arrow on the right of Retract. You can also change the amount of retraction or extrusion. Remove the filament by clicking on the retract button (you may need to click multiple times for complete removal).
If the filament fails to come out completely, you can try pulling it gently while retracting to remove it. Note that no filament should be left in the extruder.
Step 3: Insert New Filament
Now that the old filament has been removed, it’s time to insert the new replacement filament. First, check that your extruder is heated up properly. Get the new replacement filament, insert it into the extruder, and then push the filament down until it won’t go any further.
Step 4: Extrude the Filament

Then you’ll have to extrude the filament. Click on the extrude button and give a gentle push on the filament until it gets caught by the gears, and thereafter let the extruder do the rest of work (you can actually feel the motor pulling the filament in).
Note: If you’re changing colors, you may need to run the extruder for a few moments to clear out the old color before completing the filament loading process.
As a matter of fact, changing filament can vary from 3D printer to 3D printer, and therefore the above-mentioned 4 easy steps on how to change 3D printer filament only serve as generalized guidelines for your reference. If you experience any problem during filament changing, please consult your 3D printer documentation for specific steps, or if you have any other better idea on how to change 3D printer filament, just feel free to share with us.
Post time: Apr-23-2019